If you’ve been thinking about tapping into the power of the sun to cut your electricity bills and be energy independent, you might be asking yourself: “Can I install solar energy myself?” Great question! In this guide, I’ll walk you through the practical steps you can take to install solar panels on your own—if you decide that’s the route you want to go.
Why You Should Consider Going Solar
Before we get into the nitty-gritty of installation, let’s quickly review why solar energy is worth considering:
- Cost Savings: On average, homeowners can save around 20-50% a year on energy bills after installing solar panels, according to Solar Energy Industries Association (SEIA). That’s money back in your pocket!
- Home Value Increase: Homes equipped with solar energy systems tend to sell for more. A Zillow study found that they sold for about 4.1% more than similar homes without solar.
- Energy Independence: By generating their own electricity, homeowners can become less reliant on the grid, which is amazing.
- Environmental Impact: Solar energy is a clean, renewable resource. By going solar, you can significantly reduce your carbon footprint.
The DIY Solar Installation Decision
Now, let’s tackle the question at hand: Can you install solar panels yourself? Yes, you can! But it requires some preparation and understanding. Here’s a straightforward approach to help you decide if DIY is for you.
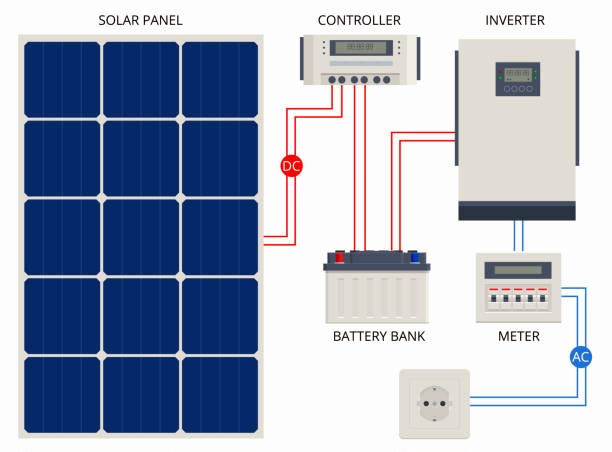
1. Understand the Components of a Solar System
Before jumping in, you need to know the basic components of a solar energy system:
2. Assess Your Skills and Tools
Ask yourself a few questions:
- Do you have basic electrical knowledge? If not, you may need to learn or consider hiring a professional.
- Are you comfortable working on ladders or rooftops? If heights make you uneasy, it might be safer to hire someone.
- What tools do you have? You’ll need a drill, wrenches, safety gear, and possibly a voltage tester.
3. Research and Planning
Here’s a step-by-step plan to help you get started:
Step 1: Calculate Your Energy Needs
- Look at your past utility bills to find your monthly energy usage in kilowatt-hours (kWh). This will help you determine how many solar panels you need.
Step 2: Evaluate Your Roof - Check the condition of your roof. Ensure it’s structurally sound and can hold the weight of the panels. Ideally, your roof should face south, but east or west is also okay.
Step 3: Choose Your Equipment - Research and select high-quality solar panels and inverters. Look for efficiency ratings and customer reviews.
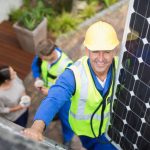
4. Installation Steps: A Practical Walkthrough
If you’re ready to install your solar panels, follow these practical steps:
Step 1: Gather Your Materials and Tools
- Ensure you have everything you need: solar panels, inverter, mounting brackets, wiring, safety gear (gloves, goggles, hard hat), and tools.
Step 2: Prepare Your Roof - Clear the area where you’ll be working, removing any debris or obstacles.
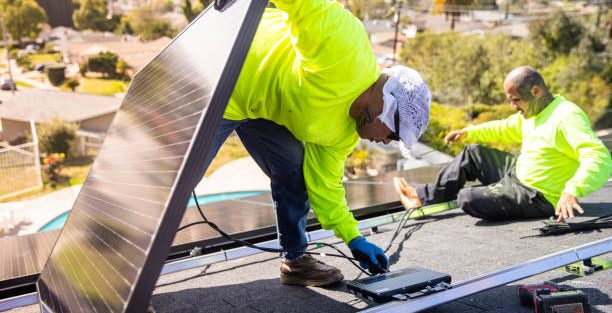
Step 3: Install the Mounting Brackets - Follow the manufacturer’s instructions to install the mounting brackets securely. Use a level to ensure they’re straight. Typically, you’ll want to install these on the rafters of your roof for maximum stability.
Step 4: Attach the Solar Panels - Once the brackets are in place, carefully lift the solar panels onto the mounts. Secure them according to the instructions provided by the manufacturer.
Step 5: Install the Inverter - Choose a shaded location for your inverter, usually on an exterior wall of your garage or home. Follow the manufacturer’s instructions for installation.
Step 6: Connect the Wiring - Connect the solar panels to the inverter using the appropriate wiring. Make sure to follow all safety procedures and local codes. If you’re unsure, consult a professional for this step.
Step 7: Connect to Your Electrical Panel
This step is crucial and may require an electrician, as it involves working with the electrical system of your home. If you’re not comfortable doing this: Hire a Professional: It’s often best to have an electrician handle the connection to
your electrical panel. This ensures safety.
If you decide to take this on:
- Turn Off Power: Safety first! Make sure to turn off the main power to your home before proceeding.
- Connect the Inverter to the Main Panel: Use the appropriate gauge wire to connect the inverter output to your main service panel (breaker box). Follow the inverter manufacturer’s instructions carefully.
- Install a Disconnect Switch: This switch allows you to quickly disconnect the solar system from the grid if necessary. It should be easily accessible and compliant with local codes.
- Turn the Power Back On: Once everything is connected, turn the main power back on. Check that the inverter is functioning correctly; most have a display that shows when they’re producing electricity.
5. Testing Your System
Once everything is connected, it’s time to test your system:
- Check the Inverter: Look at the inverter display to ensure it’s generating power. Most inverters will show you the amount of electricity being produced.
- Monitor Your Usage: Over the next few days, keep an eye on your energy bills and monitor how much power your solar system generates.
6. Maintenance and Ongoing Care
After installation, solar panels require very little maintenance, but here are a few tips to keep your system running smoothly:
- Clean Your Panels: Dust, leaves, and debris can accumulate on your panels, reducing their efficiency. Clean them with a soft brush or hose occasionally, especially if you live in a dusty area or near trees.
- Inspect Regularly: Check the panels and mounting equipment for any signs of damage or wear. Look for loose connections, cracks in the glass, or corrosion.
- Monitor Performance: Use the monitoring app to keep track of your system’s performance. If you notice a significant drop in production, it might be time to call in a professional.
Conclusion: Is DIY Solar Right for You?
So, can you install solar energy yourself? Yes! With the right preparation, knowledge, and tools, you can definitely take on this project. However, it’s vital to assess your skills and comfort level along the way. If at any point you feel unsure—especially regarding electrical connections—don’t hesitate to hire a professional. powernow.io will make all that possible.
Remember, going solar is a significant investment that can provide long-term savings and environmental benefits. Whether you choose the DIY route or enlist the help of professionals, the important thing is that you’re taking steps toward a more sustainable and energy-efficient home.